In brief
- The effect uses a Gobo filter attached to a Spot Light shining through the window.
- Connecting Noise to the Gobo’s Slide Map input adds color variation to the light pattern.
- The balloon material uses Standard Surface, LayerRGBA, Utility, and Color Jitter nodes.
- Compatible with Arnold for Cinema 4D 4.9.5 and Cinema 4D 2025.0.0 and later.
What you’ll learn in this guide
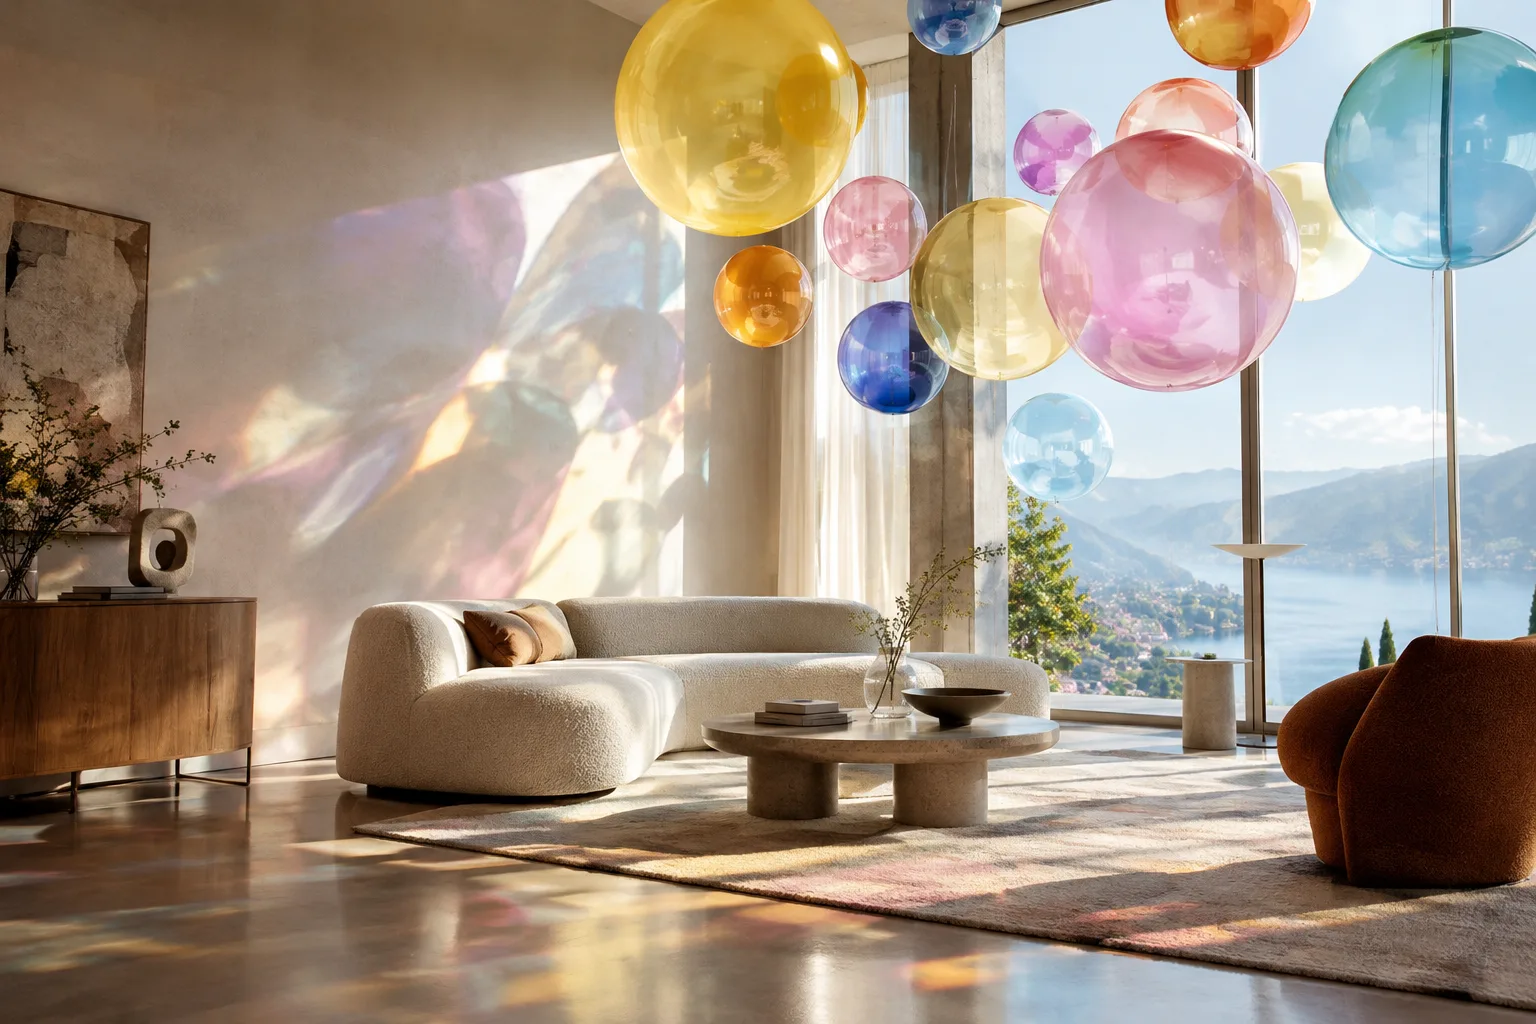
In this project, we’ll set up a scene where light entering through a window passes between balloons and casts colorful patterns around the room. The Arnold for Cinema 4D guide combines the lighting setup, Gobo filter, and balloon shading network. The aim isn’t just to color the balloons, but also to control the colorful effect the light brings to the scene.
The workflow has three parts: first, set up the camera and environment lighting; then place a Spot Light behind the balloons and attach a Gobo to it. Finally, build the balloon material. The guide’s values can serve as a starting point; it notes in particular that the Noise scale may need to be adjusted to match the size of the scene.
Requirements
The guide uses Arnold for Cinema 4D and notes that a downloadable scene file is available for anyone who wants to recreate the effect exactly. The example page doesn’t specify which Cinema 4D or Arnold version was used to create the scene. So don’t assume the scene file will open without issues in different versions.
As for current version information, Autodesk’s Arnold for Cinema 4D 4.9.5 notes state that the plugin uses Arnold 7.5.4.0. The notes list compatibility with Cinema 4D 2025.0.0 and later, 2026.0.0 and later, and 2027.0.0 and later. The plugin is available to download through Autodesk Account. The guide doesn’t specify any additional cost, subscription type, or special hardware requirement for this effect.
Step-by-step colorful lighting setup
Set up the camera and environment lighting. Position the camera to face the window. Create a Skydome Light and connect a Physical Sky to its Color input. The example Skydome settings are Exposure 2 and Samples 3. The Shadow Color (HSV) value is given as 4,213; 0,785; 0,053. Set Camera Visibility and Transmission Visibility to 0.
The example uses Turbidity 8,916, Elevation 90, Azimuth 247,229, and Intensity 2 for Physical Sky. Sky Tint Color (HSV) is 353,299; 0,588; 1,000, while Sun Tint is 44,261; 0,177; 1,000. Enter these as initial setup values; the guide doesn’t claim they’ll produce the same result in every scene.
Place a Spot Light behind the balloons. Aim the light toward the window and position it behind the balloons. The example settings are Cone Angle 144,213, Exposure 19, and Samples 3. A Radius of 44 is used for softer shadows. Shadow Color (HSV) is 13,230; 0,785; 0,019; Specular Visibility (Contribution) and SSS Visibility (Contribution) are both set to 0,1.
The guide hides the window glass and disables shadow casting from the balloons. These choices are part of the setup used to make the lighting work as shown in the example. Keep in mind that changing the light direction will also change the colorful pattern in the room.
Attach a Gobo filter to the light. Add a Gobo filter to the Spot Light and set Filter Mode to Mix. Increase Density to 0,65. Then create a Noise shader and connect it to the Gobo’s Slide Map input. This gives the light a varied pattern instead of uniform illumination.
The example Noise settings are Octaves 4, Distortion 1,687, Lacunarity 2,831, and Scale XYZ 33. Set Coord Space to UV and Mode to Vector. The guide specifically notes that Scale XYZ may need to be adjusted to match the size of the scene. If the pattern looks too tight or too broad, start by adjusting this scale to suit your scene.
To experiment further with the color distribution of the effect, you can add a Color Correct shader before Noise. The guide’s example sets Saturation to 1,6. This step isn’t required; it’s an optional adjustment to try after setting up the basic Gobo configuration.
Create the balloon material
Start with Standard Surface. Assign a Standard Surface to the balloon objects and rename the material BalloonMat. Set Specular Roughness to 0,36, Subsurface Weight to 0,5, and Subsurface Scale to 10. Set Subsurface Type to randomwalk2.
Add color and per-object variation. Create a LayerRGBA shader and connect it to BalloonMat’s Base Color, Subsurface Color, and Subsurface Radius inputs. Connect Utility to LayerRGBA’s Input1 and Color Jitter to Input2. In the Layer2 section, set Operation to Multiply and Mix to 0,645.
In Color Jitter, set Type to Object; set Gain Max to 4, Saturation Min to 0,38, Saturation Max to 1,076, and Seed to 2313. In the example, setting the Utility shader’s Shade Mode to Flat and Color Mode to Object gives the balloons different colors on a per-object basis. Being able to control this network separately from the lighting setup makes it easier to adjust the balloon colors without changing the Gobo configuration.
Common issues
The colorful pattern isn’t visible in the scene: Make sure the Spot Light is behind the balloons and aimed toward the window. Connecting the Gobo to the light, setting Filter Mode to Mix, and connecting Noise to the Slide Map input form the basic chain described in the guide. Also check that the window glass is hidden and the balloons’ shadows are disabled.
The pattern looks too tight or too large: The Noise Scale XYZ value may need to change depending on the scene’s dimensions. The example value is 33, but the guide notes that it may need to be adjusted for different scenes. Start by changing this setting to assess the pattern scale.
The balloon colors look too similar: Check that Color Jitter’s Type is set to Object and that the Utility shader’s Color Mode is also set to Object. Verify that LayerRGBA is connected to the Base Color, Subsurface Color, and Subsurface Radius inputs.
Impact on architectural visualization workflows
This setup can be used in interior visualizations to explore how light from a window can create a colorful, stylized effect on surfaces. Separating the light filter from the material colors is useful for visualization artists who want to add movement, color, and a strong atmosphere to a scene. However, the guide doesn’t present the result as a physically accurate architectural lighting calculation; the example is built around a creative render effect.
For studios, testing the Gobo pattern and balloon material in a small scene before moving the setup into the main interior scene is a controlled approach. Check version compatibility and confirm that the scene file opens before starting the workflow. The latest Arnold for Cinema 4D notes describe viewport rendering support with GPU and CPU, but that doesn’t guarantee the same performance on every machine. Test renders on your own hardware and with your project settings are essential, especially for heavy scenes.
Next steps
First, use the example values to get the basic image, then change one setting at a time and compare the results. Try Gobo density, Noise scale, and the optional Color Correct setting separately to examine the colorful light pattern. For the balloon material, adjust the color distribution by checking the LayerRGBA connections and Color Jitter values. This makes it easier to tell which changes affect the light pattern and which affect the appearance of the balloons.
Source and licensing
This tutorial has been adapted into Turkish from the setup and settings in Autodesk’s “Caustic Balloon Effect” guide for Arnold for Cinema 4D. The source page is publicly accessible and marked as freely available. Version and compatibility information comes from Autodesk’s Arnold for Cinema 4D 4.9.5 release notes.
Sources
2 sourcesSource texts are not republished; short quotes are marked, everything else is our own summary and commentary.
This example offers a clear, reusable setup for creating eye-catching colorful light patterns in interior renders. Per-object color variation in the balloon material can also add visual rhythm to the scene. However, it’s best thought of as a stylized storytelling tool rather than a realistic lighting simulation.
For studios and students in Turkey, the most important practical step is to match the plugin version to Cinema 4D and test the setup in a small scene on their own hardware. The sources don’t specify pricing or licensing costs, so current terms should be checked separately when considering a purchase or subscription. Testing the example values in measured steps before using them in a production scene can save time.
Frequently asked questions
How do you create a colorful balloon caustics effect in Arnold?
Place a Spot Light behind the balloons and attach a Gobo filter to the light. Connect Noise to the Gobo’s Slide Map input and assign the balloons a Standard Surface-based material.
Which settings are used for the Arnold Gobo filter?
The example guide uses Mix for Filter Mode and 0,65 for Density. It also describes connecting a Noise shader to Slide Map and adjusting Scale XYZ to suit the size of the scene.
Which Cinema 4D versions are compatible with Arnold for Cinema 4D 4.9.5?
Autodesk’s release notes list Cinema 4D 2025.0.0 and later, 2026.0.0 and later, and 2027.0.0 and later.